
I. Introduction
First, Alibaba Cloud Lightweight Application Servers (Simple Application Servers) are divided into different Application Images and System Images. The environment used in this article is the WordPress Image, which defaults to Alibaba Cloud Linux. If you choose a different System Image, you will need to manually install the WordPress environment yourself.
Application Images (13 types): These offer options such as WordPress, LAMP, Docker, and Node.js. They reduce the need for uploading and installing applications, offering an "out-of-the-box" experience.
Note ⚠️: This tutorial is intended for reference purposes only regarding the general approach. It is not recommended to use the default WordPress image based on Alibaba Cloud Linux. Instead, it is suggested that you refer to this article to set up a WordPress site using a Debian system.
System Images (8 types): These are suitable for users who are familiar with operating systems and application environment configuration. System images provide a clean, initial operating system environment, allowing you to install applications according to your specific needs.
In short, this article demonstrates how to set up a second WordPress site when one already exists. Other system environments are for reference only. Using this method, you can sequentially set up a third or fourth WordPress site, provided your server configuration permits it.
The process is essentially divided into three steps:
First: Install WordPress for the new website.
Second: Configure the database for the new website.
Third: Configure Nginx.
Note ⚠️: Before proceeding, please create a snapshot backup to prevent any accidental data loss.
2. Install WordPress
The default installation path of the first website is /data/wwwroot/wordpress, so after we connect to the server, we first create a folder for the new website.
mkdir /data/wwwroot/site2/
Then download WordPress.
cd /data/wwwroot/site2/
wget https://wordpress.org/latest.tar.gz
Unzip the WordPress installation package.
tar -xzvf latest.tar.gz
At this time, under the site2 path, there is a WordPress installation package latest.tar.gz and the decompressed WordPress directory; first delete the installation package latest.tar.gz, and then enter the WordPress directory.
rm latest.tar.gz
cd wordpress/
3. Configure the database
mysql -u root -p
The database password can be viewed using the sudo cat /root/ReadMe command; configure the database after entering the password.
create database wp_site2 default character set utf8 collate utf8_unicode_ci;
grant all on wp_site2.* to 'user_site2'@'localhost' identified by 'password';
flush privileges;
exit
For the above identified by ‘password’, it is best to set a more complex password and write it down.
Make a copy of the WordPress configuration file and edit it.
cp wp-config-sample.php wp-config.php
vim wp-config.php
Modify the database name, username and password in sequence.(Password here is the password set above)

Continue to scroll down, delete the content in the red box, copy the link pointed by the arrow and open it in the browser, select all the content in the web page, and replace it with the original position of the red box.


4. Configure Nginx files
The Nginx configuration file is in the /usr/local/nginx/conf/vhost/ path by default. There is already a wordpress.conf file in this directory; first we edit this file.
cd /usr/local/nginx/conf/vhost/
vim wordpress.conf
The default configuration file Server is empty, change it to server_name site1.com www.site1.com; site1 here should be the domain name of the first website you built.
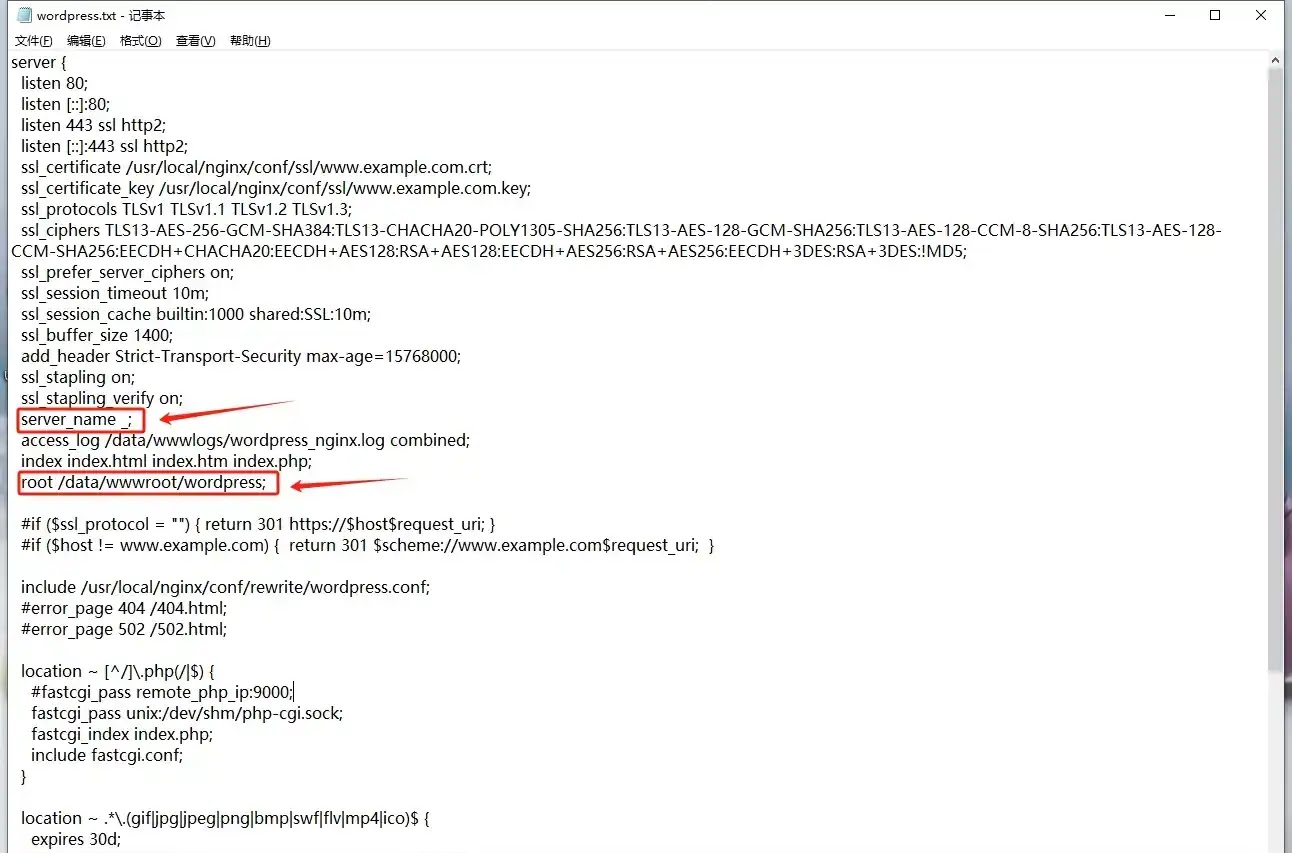
The default path does not need to be changed; then copy the configuration file and edit it.
cp wordpress.conf site2.conf
vim site2.conf
The server_name here is changed to site2.com www.site2.com; the site2 here is the domain name of the second website you built. The path here is modified to: root /data/wwwroot/site2/wordpress;
After the modification is completed, test it:
nginx -t
As shown in the picture, if it prompts successful, then there is no problem.

Restart the Nginx service.
systemctl restart nginx
Finally, you can enter site2.com in the browser to complete the WordPress installation.

5. Error message when installing plug-in: Failed to connect to FTP server
Executing the following command can solve the problem:
chown -R www /data/wwwroot/site2/wordpress


0 Comments