

Among the web hosting service providers, SiteGround has generally had a good reputation in the past few years. However, in recent years, the new crown epidemic caused global inflation by the Federal Reserve’s frenzy of currency. The price of SiteGround virtual hosting has increased and the discount period has been shortened. The biggest problem is that the renewal price has increased several times according to the regular price, which is unacceptable to many users.
Therefore, I specially recommended two other alternative web hosting providers, ChemiCloud and FastComet, in the previous article on the review of many website hosting providers.
These two web hosting providers, I have been on trial for almost half a year, and they are relatively reliable alternatives. The advantages are also more prominent: cheap price (can be locked for a long period of use), powerful specifications (multi-core large memory), newer technology (using LiteSpeed), etc.
The upgrade option on top of virtual hosting is managed cloud VPS. The hottest representative in recent years is Cloudways, a hosting service provider headquartered in Malta, Europe.
As a representative of managed cloud servers, Cloudways integrates a number of well-known cloud VPS service providers to conduct business, such as Linode, AWS, Digital Ocean, Vultr and Google Cloud and other cloud VPS servers. Cloudways rents cloud servers from these cloud server merchants, and then makes relevant configurations to simplify the process of user setup and use, so that website builders of any stage and level can quickly get started with this website host (accurately, cloud VPS).
The charging method of Cloudways is the same as that of cloud service providers such as Linode, Vultr, etc., and it is also a post-payment model with monthly payments. But the cost is higher than that of the cloud server, which is equivalent to earning a service fee.
A Brief Introduction to Cloudways Hosting Features
Cloudways is a very high-quality managed cloud hosting service provider. Below I will briefly introduce the hosting package plan, customer service, speed, security, control, and functionality.
Hosting Plan
3-day free trial: Cloudways offers a 3-day free trial.
Quickly change the configuration of the cloud service: You can upgrade the hosting plan at any time according to the actual traffic of the website and the needs of building the website.
Monthly payment, fixed fee, deactivation at any time: Like cloud servers such as Linode, Cloudways is also billed by the hour, billed at the end of each month, and can be deactivated at any time.
Customer Service
7x24x365 online customer service: Cloudways provides online chat customer service, you can communicate quickly if you have any questions, and the waiting time for a response usually does not exceed 1 minute.
Work order system: that is, our commonly used support ticket, which is processed in a form similar to the service order in the system.
Phone support is also available.
Host Speed
In fact, this mainly depends on the speed of the cloud VPS servers integrated by Cloudways.
Dedicated and isolated environment: Each user has their own independent space and will not be affected by each other. But note: between cloud VPS, CPU may still be shared, called vCPU.
Faster hard disk: such as NVMe hard disk, which is 3-4 times faster than the general virtual host SATA SSD, shortening the web page reading time.
Built-in server-level caching: such as Memcached, Varnish, Redis, etc., greatly improving website speed.
Cloudways CDN: The built-in one-click CDN access acceleration service can improve the experience of website visitors.
Host Security
Dedicated firewall: All hosts have advanced firewall protection, which can filter out many malicious traffic and intrusion attempts.
Free SSL Certificate: Install SSL certificate, enable https access, get the little lock in front of URL in browser address bar, which is important for Google SEO ranking.
Bot Protection: A WordPress security tool developed by Cloudways and partner Malcare that can block brute force login attacks on websites, Dos attacks, bad web crawlers, and more.
Flexible Host Management
Multiple websites can be set up (test site Staging is convenient): Cloudways provides a one-click WordPress website installation function, which can set up multiple websites. Each website will be equipped with a temporary website domain name, which is very convenient after waiting for the website to be completed and then updated to the official website domain name.
One-click copy server and website: You can use this function when you want to make some changes, but do not want to make changes on the running website to avoid affecting the access experience. Or, if you want to quickly build a site with a similar structure, without having to start from scratch, you can also use this feature.
Easily upgrade PHP version: Cloudways supports the latest PHP version, and you can switch versions with a single click, keeping your website always up-to-date.
Host Backup and Website Relocation
One-click backup and restore: Cloudways provides daily website backups. If any website goes wrong, just select the date you want to restore, and click the button to restore. Similar to Alibaba Cloud's snapshot recovery and Linode VPS's Restore.
WP Migrator website migration plug-in: This is a website migration plug-in developed by Cloudways itself. You only need to set the basic data to migrate the website directly online (in fact, there are quite a lot of such plug-ins, and it is relatively easy to develop).
If you like the new experience brought by Cloudways after the trial, remember to bind your credit card information, otherwise the website during your trial period will be cleared after the trial ends.
Cloudways Price
Put the screenshot of the official website price first, and you can see that you have 5 choices of cloud VPS server. AWS is more expensive, and business websites use it. The main choices are the first three: DigitalOcean (DO), Vultr, and Linode.
First look at the price of Linode:
On the Linode official website, the price of 1 core 1G is $5, and the price of 1 core 2G is $10.

After Cloudways hosting is integrated, the price basically doubles.
The price of 1 core 1G is $12/month, and the price of 1 core 2G is $24/month. If you want to choose Linode (my personal preference), you can choose 1 core 1G, 12 dollars / month plan.

Likewise, Vultr starts at double the price. For example, the prices of Standard and High Frequency of Vultr VPS, the prices on the official website are:
Regular performance 1vCPU 1G RAM $5/month
High frequency CPU 1vCPU 1G RAM $6/month
Regular performance 1vCPU 2G RAM $10/month
High frequency CPU 1vCPU 2G RAM $12/month


The corresponding price of Cloudways is:
Regular performance 1vCPU 1G RAM $5/month => $11/month
High frequency CPU 1vCPU 1G memory USD 6/month => USD 13/month
Regular performance 1vCPU 2G RAM $10/month => $23/month
High frequency CPU 1vCPU 2G RAM $12/month => $26/month
Generally speaking, the Cloudways package with 1 core and 1G memory is basically different cloud service providers, and the price ranges from US$10 to US$13.
I suggest choosing 1 core and 1G is enough. After all, as a cloud server, the configuration can be upgraded at any time.
Sign up for a Cloudways account and cooperate with the new account review
Go to the official Cloudways website and click the START FREE button on the homepage.

On the registration page, you can directly use your Google account to register, or you can fill in the relevant form below to register. Note that when filling in the email address, try to use the business email address or Gmail address.
After filling in and submitting, a prompt review page will appear:
Tell you that you need to send an email to av@cloudways.com with the email address you filled in during registration, with any content. for example:
Hi Cloudways Team,

I'm writing for account verification. Could you please check my registration and get the verification done?

Thank you.
After that, you will receive a reply email, requiring you to provide further review files:

According to the requirements, after sending an email to verify@cloudways.com, you will receive the email soon, reply that the account has been approved, and click to activate the account.
After that, the user backend will be logged in. After logging in to the backend, a prompt pop-up window will appear, offering a 3-day free trial. The 3-day experience is actually not long, so there is no need to wait until it expires before upgrading to a formal user. It is recommended to upgrade directly.
Click the portrait in the upper right corner – click account, then click Payment & Address on the left menu, enter your contact information and continue to fill in credit card information (only Visa, MasterCard and Amex are supported), and then click Authorize.
This authorization button does not directly start deduction after clicking the authorization button. Like Linode, Cloudways uses the model of first use and then payment, so the binding credit card will not be charged immediately. The billing will only start after the new server is built, and the credit card bill will be deducted in the next month, the deduction is the cost of the previous month, and so on.
In addition to credit cards, Cloudways also supports PayPal's activation payment, but there is no payment menu here. If you want to use Paypal to activate the payment, you need to send an email to billing@cloudways.com. Simply explain that you don't have a credit card to pay in US dollars, but you have Paypal. If you want to use Paypal to activate your account and pay, just ask them to help you.
So don't worry here, after filling in the credit card information, click Authorize.
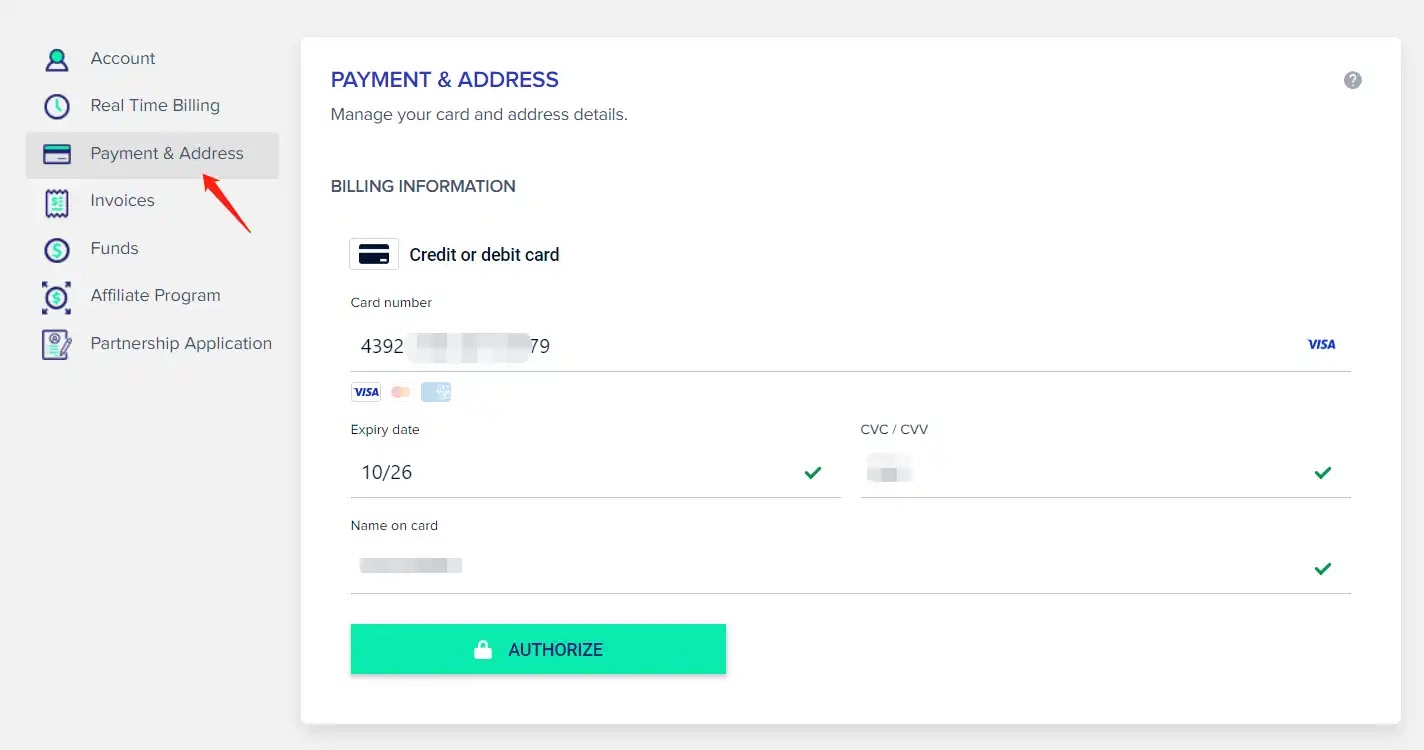
As long as the credit card information is correct, a Congratulations success message will appear.
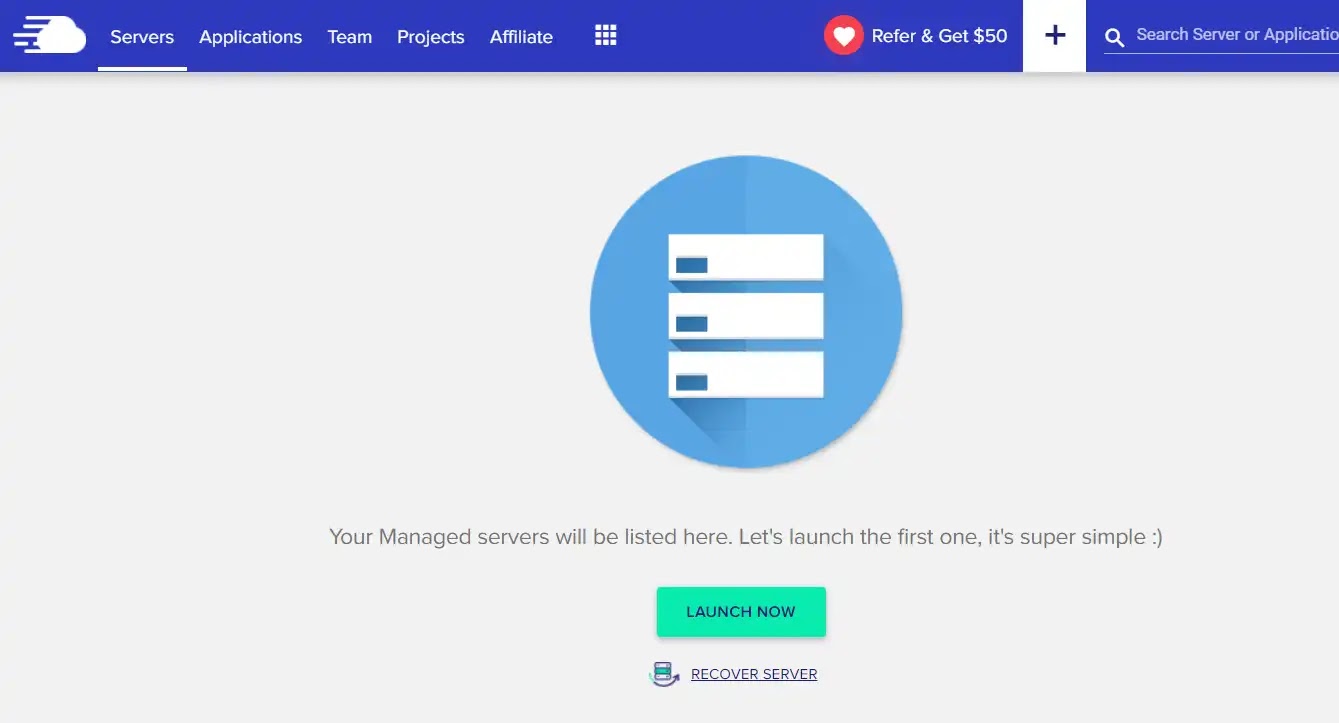
Create server and configure
Next, click Server on the left side of the top menu to create a new server.
First select the application ( Select the application ) and choose the latest version of WordPress, which is usually the first option.
Then you need to give the hosting a distinguished name first, then the server, and finally the project name.
The project name belongs to the largest category, such as website building plan, network marketing project, Be Rich plan, and Great Greet Again (anyway, it is just a logo name that can be changed later). Multiple servers can be created under one project.
Please feel free to name, Name Your Managed Server Here, you can also directly fill in the domain name of the website, so that in the server list, the identification degree is relatively high, and you can see which website is built on this server at a glance.

Server selection
Try to choose a computer server that is close to your main target market. If your customers are distributed all over the world, or if they are scattered in different continents, then choose the computer server in the United States (the best in the West of the United States).
For Linode, choose Fremont or Nawark in the United States, followed by Dallas, not Atlanta. For DigitalOcean, choose San Francisco in the United States, followed by New York.
Ok, let's get started!
Then the page refreshes, the configuration server was being added and WordPress was automatically installed, and there were video instructions on how to migrate the website on the page.

After waiting for a few minutes, it will prompt that the server is added.
Copy the IP of the server to a text note, as well as the username and password of SSH, these information are more important.

Set up DNS records for a domain


In the Cloudways ADMIN PAEL, choose Domain Management.

Add a domain name at the location shown in the picture, such as www.tigress.cc or tigress.cc (depending on whether you want to use a domain name with www. or a root domain name without www. on the homepage of your website)

After setting your newly registered domain name as Primary, click Access Details on the left, and you will find that the domain name URL of the website has been updated, and the access URL page address has also changed.

You can now click on the Application URL to access the website. However, the SSL certificate is still not enabled at this time, and the https: in the address bar of www.liaosamwp.com in the browser displays a red Not secure prompt.
We are going to self-configure SSL Certificate. This step cannot be done in advance. You must set the primary domain name in Namesilo’s domain name record setting and Cloudways background Domain Management as described in this article, and check that the domain name is accessible (indicating that the domain name record is effective) before you can start installing and configuring the SSL certificate. Otherwise, the certificate installation will fail, because the Let’s Encrypt free certificate will verify the record relationship between the domain name and ip.
Click on SSL Certificate on the left, then fill in your email address and domain name. It is recommended to write the homepage domain name and root domain name, as shown in the figure:
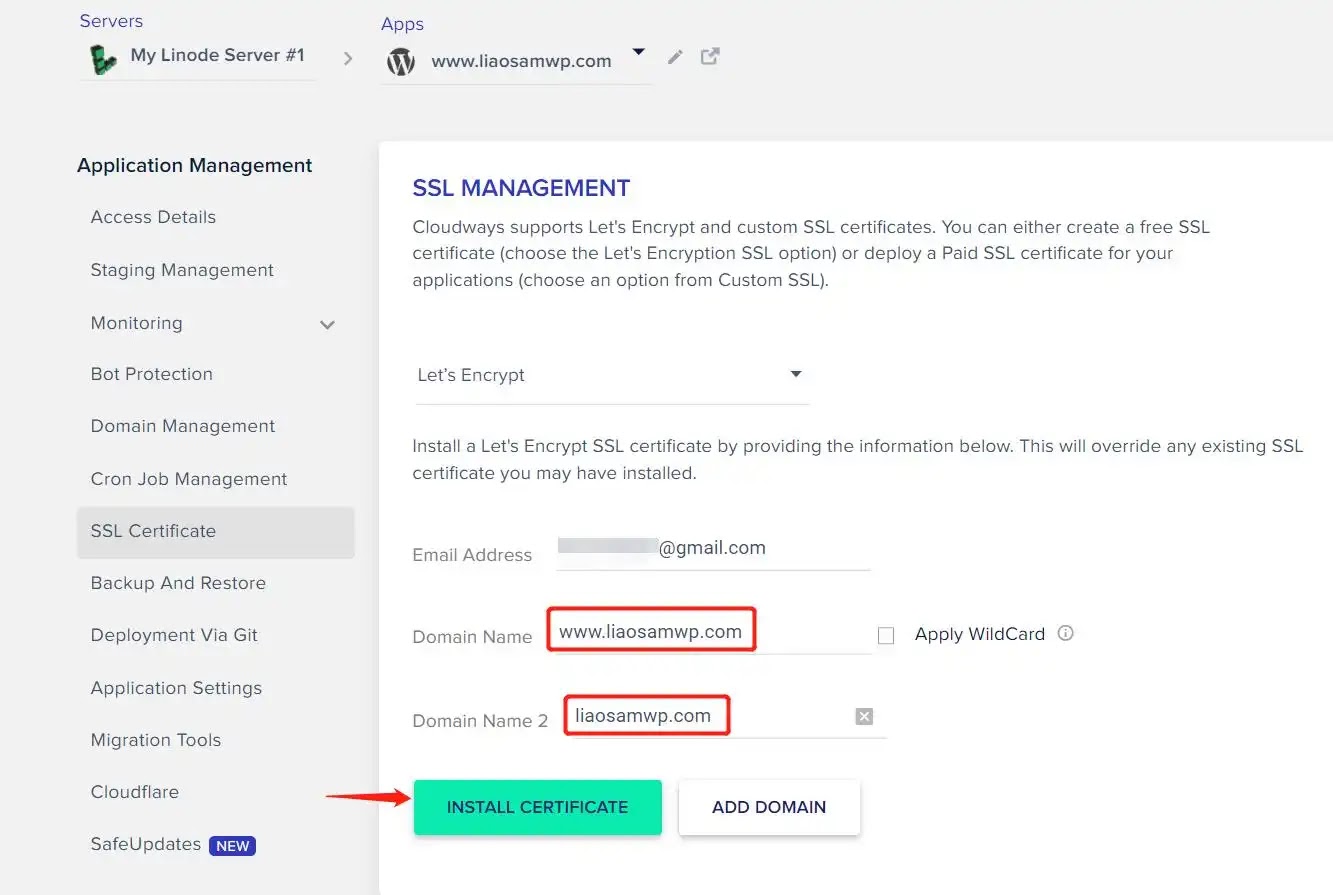
Just keep the Auto Renewal switch of the Let’s Encrypt certificate enabled, and the certificate will be automatically renewed before it expires.
After the installation is complete, click Application Settings on the left menu, and check to ensure that HTTPS REDIRECTION is enabled (Enable).
Well, at this point, the website can be accessed normally via https.


0 Comments